Making DIY Window Screens
Click on the pictures!... All images of materials and hardware in this article are linked to online catalog pages
A word to the wise: never assume that because you followed instructions, your screens are cat-proof. Test them, wiggle them, push them, rattle and shake them until you are confident that they will hold up to a grown kitty digging around them, hanging off of them, or using them as a scratcher. Keep an eye on how they wear over time. If you are not certain, DO NOT leave your kitty unsupervised with them!!
Befuddlement...?
There is a lot of information here to help you. Do your best to read thoroughly and answer your own questions. If you are not a handyperson, see if you can find a handy friend to help you out. If you need to troubleshoot an issue that is NOT addressed in this article, please do get in touch, I will be happy to help. Please also let me know if any specific part of the article is confusing or unclear.
I would also love to hear about your successes, failures and clever solutions, they help me make this page better!
-Andrea S
1. Assessing Your Needs
The first step in making DIY window screens is planning your window screens. Questions to ask yourself:
The first step in making DIY window screens is planning your window screens. Questions to ask yourself:
- What kind of windows do you have? How do they open?
- Will the screen interfere with the window functioning?
- Do you need/want the screens to be fixed in place or removeable? If removeable: will you need to remove the screen easily/frequently? Will it create a security issue?
- What kind of surfaces do you have to attach to? Are your windows and window frames/sills wood, metal, vinyl? Are there delicate surfaces such as vinyl that you need to avoid scratching or marking?
- What is your threshold for DAMAGE? eg: screwholes, scratches. What is fixable and/or, if you have one, acceptable to your landlord. Screens are easier to make and more secure if you can put a few screwholes in your window frame, and easy to fix with a bit of wood filler or spackle and paint. However, if you are at all unsure whether this will upset your landlord, please get permission! Inform your landlord what damage you plan to do (eg 4 screws in window frame) and how you plan to fix it upon move out.
|
2. Fitting the Screen to the Window
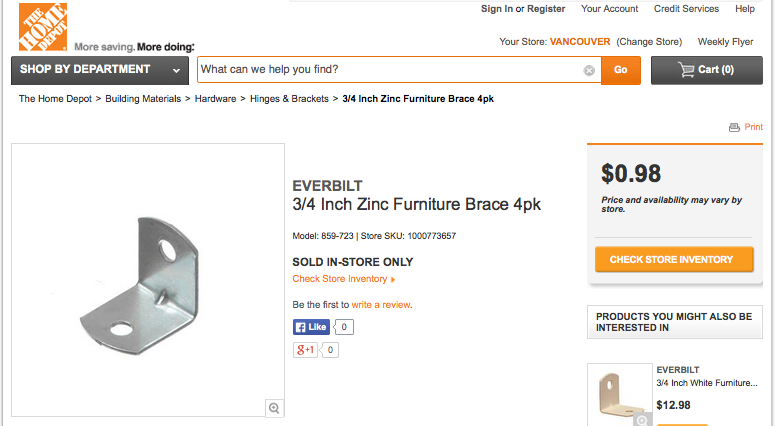
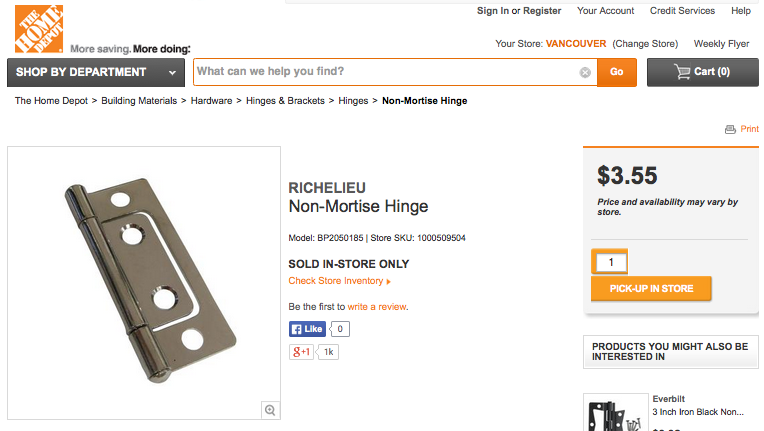
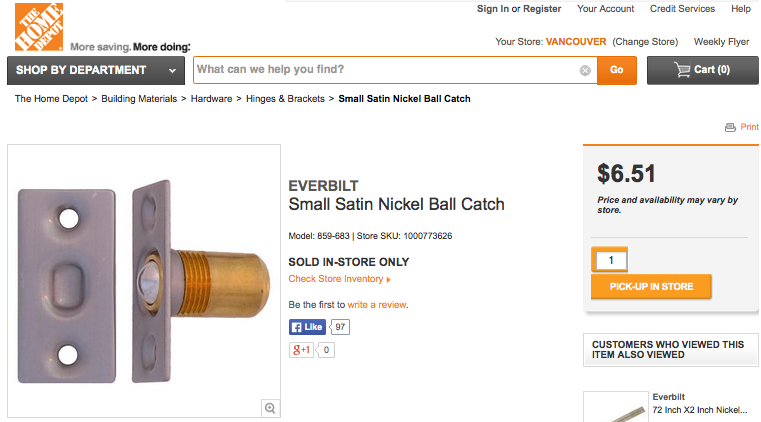
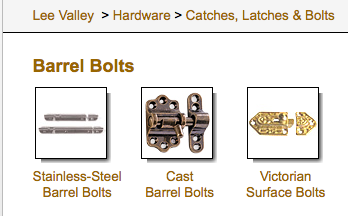
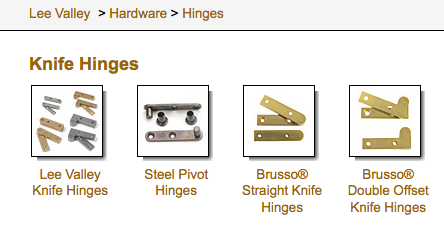
Fixed or Hinged Screens - If you are willing and able to screw into the window frame, your screens can be attached with a few small brackets or hinges. This is your easiest and most economical option. Screens can be fixed to the window frame with brackets just inside sliding windows so that the window still slides open and closed. Hinges and cabinet catches work well for wood frame windows that push out to open |
|
|
|
|

Screw-less fixed screens for sliding windows - sliding windows often have an exterior track that aligns with the fixed portion of the window. You can often fit your screen to this track so that it is fixed in place, but doesn't interfere with the sliding portion of the window on the inner track. You will need to partially disassemble it, and then reassemble it in place so that your screen is fixed "permanently" (disassemble to remove) within the window frame, without using screws.
NOTE!!: these screens will need to be made with the corner braces on the inside/good face and the mesh on the outside/bad face so that they can be reassembled once in place.
Your screen will need to fit into the track on 3 edges:
This will also work for windows that slide up and down, if there is an exterior track to fit the screen into. You will make the screen with the same orientation, so that the gap is at the top and both sides fit securely into the window track.
NOTE!!: these screens will need to be made with the corner braces on the inside/good face and the mesh on the outside/bad face so that they can be reassembled once in place.
Your screen will need to fit into the track on 3 edges:
- Measure from the inside edge to inside edge of the opening at the top and bottom: the screen will drop into the track at the bottom, leaving a slight gap at the top.
- Measure the width from the depth of the groove to the depth of the groove for the screen width: subtract 1/16" to give yourself a little wiggle room
This will also work for windows that slide up and down, if there is an exterior track to fit the screen into. You will make the screen with the same orientation, so that the gap is at the top and both sides fit securely into the window track.

Once assembled, just unscrew the corner braces from one of the side pieces and flex the screen into the window track, as shown on the right, then reattach the corner brace to lock the screen into place.
NOTE: It's perfectly ok if your screen isn't the full thickness of the window track, as long as it is secured in the frame and can't be removed.
NOTE: It's perfectly ok if your screen isn't the full thickness of the window track, as long as it is secured in the frame and can't be removed.
Removable Screens - If you need removable screens, or to avoid damage to the window frame, your screens need a means of attaching securely to the opening. The exact size of your screens may vary based on how they will be attached, or how they fit into the window track, etc.
Screens can be fixed to the window frame just inside sliding windows so that the window still slides open and closed.
Screens can be fixed to the window frame just inside sliding windows so that the window still slides open and closed.

Magnets - If you have metal windows, the easiest option is to use magnets: do check that magnets work on your windows, not all metals are "magnetic"
Lee Valley Tools (1180 SE Marine Drive) sells rare-earth magnets that are your best option, magnet cups make attaching them to your screen quick and easy and increase the magnetic strength. I recommend using 4 of the 1/2" size magnets (9 lb strength), with cups, per window screen (about $5 for 4 magnets and $4 for 4 cups) If you choose this option be sure that your screen is large enough for the magnets to make contact with the metal edges of the window. It is also preferable for the screen to be contacting the window sill/frame along the bottom, this will stop the screen from sliding down if weighted. Once magnet cups have been screwed on, check for good contact with the window edges BEFORE putting the magnets in the cups (they are tough to get out again!) |

|

Drop-in screens for sliding windows - sliding windows (and doors) can have removable screens that drop into the window track.
Per diagram: the screen fits in the track along 2 adjacent edges and is held in place by the sliding window. The sliding portion of the window will often be grooved on its outer edge, allowing the window to hold the screen securely along 3 edges. If not, the edge of the screen that meets the window will need hardware attached that will bracket it to the outer window edge.
Your screen needs to be able to fit through the opening into the window track, so measure from the inside edge of the opening at the top, to the
bottom of the window track at the bottom.
This screen configuration will also work for windows that slide up and down. Just rotate the diagram!
The window then needs to be secured in place to prevent accidental opening. A block will stop the window from sliding, but sliding windows sit loosely in their tracks at the top, and can often be lifted or rocked loose. If there is significant rocking, please put a stopper of some sort in the top track to prevent vertical movement of the window.
Depending on the thickness of your window and/or the configuration of its track: you may want thicker material to frame your screen, or extra material, or different hardware to secure the edge that meets the window. NOTE: It's perfectly ok if your screen isn't the full thickness of the window track, or moves around within the track... as long as it is secured in the frame and can't be removed.
Push-out windows
Push-out windows make things a bit more difficult: the screens must be removeable, as they will interfere with the opening and closing of the window itself. Where possible, magnets are the easiest solution for this type of window.
Push-out windows make things a bit more difficult: the screens must be removeable, as they will interfere with the opening and closing of the window itself. Where possible, magnets are the easiest solution for this type of window.

For windows without (magnetic) metal frames, 2 screens can be made to sit side by side into the window track so that they occupy the track along the bottom and both sides of the window.
Per diagram: each half of the screen slots into the window track at the side and then slides down into the bottom track, and then the 2 halves lock onto each other at the centre using a slide bolt or latch. This screen configuration should also work for push-out windows that hinge sideways. You want to just rotate the diagram, keeping the edge that does NOT fit into a track on the "hinge" side of the window (note that the screens have changed orientation, so that the top and bottom pieces are still sandwiched between the side pieces- this affects how you calculate your measurements) |


Check that the screen will slot into a secure groove in the window frame... If it does NOT have a nice secure track for your screen to sit in, you can add clips to the outside edge of each screen that will grab onto the window frame as you slide the screen into the side portion of the window track. (diagram below: red). 
|

These mirror holders are a tried and true choice for the "clips" specified above. They will have a decent amount of overlay and will leave plenty of room for movement when you are trying to put the screen in place
|
Plastic mirror clips may be kinder to vinyl frames... 
|
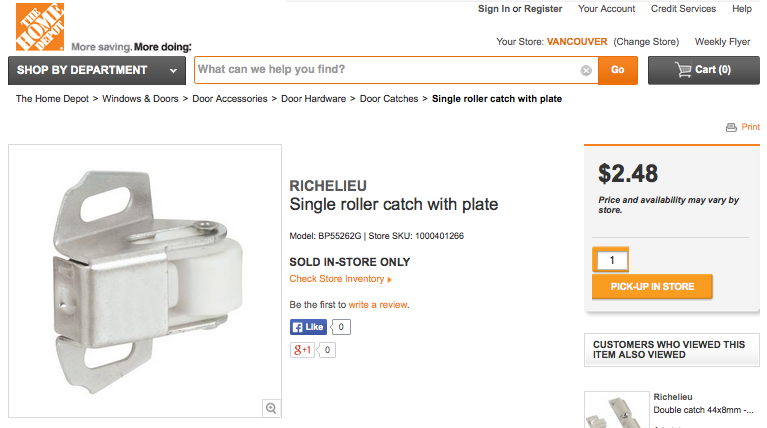
Slide bolts are another option, simply place them so that the bolt extends securely across the face of the window frame once the screens have been put in place...

|
HARDWARE PARTY! Feeling overwhelmed? Underwhelmed? Unenthused? Here's a bunch more fun and/or functional catches, latches, slide bolts and etceteras from Lee Valley that will hopefully get your creative juices flowing!!
|

|
|

|

|

|

|

3. Making Your Screen
Making the screen itself is a relatively simple process, per assembly diagram below. L-brackets hold the wood frame together and then the screen is cut and screwed in place on the frame. Recommended lumber and hardware are pictured below. You will need a power drill, 3/32" drill bit, driver bits for your screws, and a pair of tin snips (aviation snips).
If you do not have access to tools for cutting your lumber to length, large hardware stores sometimes provide this service... the Home Depot at 900 Terminal Ave does. Call or check online to be sure at other stores. You will need to plan your windows and have your measurements ready when you go in.
*NOTE: when getting your measurements, be aware that these screens go together with the top and bottom pieces of the frame sandwiched between the side pieces. Because of this you will want your top and bottom to be the desired width of the frame MINUS the width of the side pieces. Because lumber sizes can vary, the most accurate way to calculate the length of your top and bottom pieces is to measure for the full size of the frame, then take your tape measure to the store and simply measure 2 widths of the lumber in the store and subtract that from your measurement.

Materials
Pine 1"x 2" lumber is sturdy, paintable, and your cheapest option. avoid MDF as it breaks easily and will come apart if rained on.
Note that lumber sizes are nominal, actual dimensions will be closer to 3/4"x 1 1/2"
You can get your lumber in 7' or 14' lengths, 14' lengths are cheaper per foot, but keep in mind you will pay for the entire piece of lumber, not just the pieces you have cut.

Corner Braces are available in various styles, these L-shaped surface braces are cheap, easy to use and make for a relatively sturdy frame.
You will want to use 1/2" to 5/8" long screws only, to avoid your screws poking through the other side. Check that your hardware comes with appropriate length of screws, and that you have the correct driver bit for them. If not, purchase 5/8" flat-head screws to fit your driver bit.
If you have the tools and know-how, you can dowel your frame together or use your own choice of joinery method.

Fancy Hardware: If you have the time and prefer to spend a few extra dollars on nicer looking hardware, Lee Valley Tools on Marine Drive has a great selection of functional and attractive hardware. Prices are available online.
Keep in mind the dimensions of your lumber when choosing hardware, and ask at the desk if you are unsure whether something will work for your screen - the staff is very helpful.
*Note that some or all of the assembly steps below may not apply for different hardware
Keep in mind the dimensions of your lumber when choosing hardware, and ask at the desk if you are unsure whether something will work for your screen - the staff is very helpful.
*Note that some or all of the assembly steps below may not apply for different hardware

Screening Material: I recommend 1/4" hardware mesh as screening material. It is a square metal mesh intended for garden fencing: strong enough to hold up to a rambunctious cat and not unreasonably ugly.
If you want bug-proof screens I recommend just overlaying it with regular bug screening. "Pet-proof" screening is also available, usually in windows and doors sections, it is more expensive - around $45 for 31" x 6 1/2 feet and I was unable to find an online catalogue link for it. I personally am more comfortable having hardware mesh, and wouldn't leave an active cat unsupervised with just the pet-proof screening.
Hardware mesh is also available in 1/2", 3/4", and 1" mesh: the larger mesh sizes are also slightly cheaper
If you are looking for something fancier, you should also consider the expanded Aluminum Mesh at Metal Supermarket in Burnaby
|
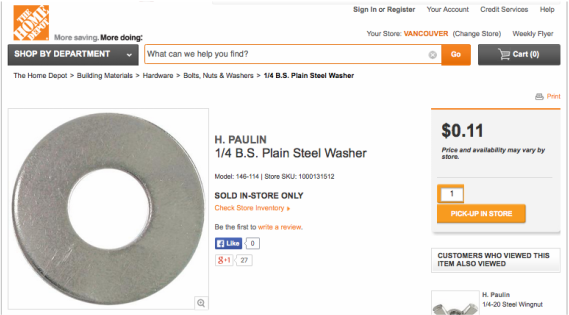
Attaching the screen: Truss-head or pan-head screws (rounded heads) and small, light washers will hold the mesh securely in place, You will want to add a screw every approx 4". Pre-drill to prevent splits in the wood.
If you use bug screen or "pet-proof" screen you will want to staple or tack it tightly into place to smooth out any puckering, probably every 1/2" - 1" along the edges. Flat thumbtacks will work. Lee Valley has a slew of decorative nails and tacks. 
|

|

Assembling the Screen
1. Lay out your pieces on a flat surface the way they will be assembled. Be sure to have the top and bottom sandwiched between the sides, and check your measurements.
2. Hold the corner brace in place and use its holes to mark where your screws will go. DO NOT put the braces too close to the edge of the wood, or it may split when you put the screws in, always leave about 1/4" (~5 mm) between the screw and the edge of the wood. Pre-drilling your screw holes will also help prevent splitting.
3. Per diagram: Use your 1/8" drill bit to pre-drill for the 2 screws closest to the corner, for each corner. Put the first 2 screws in each corner, then check that your frame is still square by measuring both diagonals - adjust the frame if needed. Then with your brackets still attached, pre-drill and screw into the remaining holes.
4. Lay the frame over the hardware mesh and mark out where to cut, then use your tin snips to cut it close to the wires of the mesh so there are a minimum of little pokey bits along the edge. It is unlikely the mesh will be square, but usually it is square enough to cut a rectangle that can be screwed securely to the frame without any overhanging edges.
"pet-proof" or bug screening can simply be cut with a utility/exacto knife.
5. Screw the mesh/screening in place along all 4 edges, keeping it as flat as possible.
1. Lay out your pieces on a flat surface the way they will be assembled. Be sure to have the top and bottom sandwiched between the sides, and check your measurements.
2. Hold the corner brace in place and use its holes to mark where your screws will go. DO NOT put the braces too close to the edge of the wood, or it may split when you put the screws in, always leave about 1/4" (~5 mm) between the screw and the edge of the wood. Pre-drilling your screw holes will also help prevent splitting.
- TIP - You will want to keep the joints nice and tight and square while marking your screw holes: using masking tape to hold everything in place is helpful, and you can do all your pre-drilling with the masking tape in place.
- TIP - Be careful not to drill all the way through when pre-drilling! Wrapping a piece of masking tape around your drill bit 1/2" (~10 mm) from the end of the bit will give you a visual reference to avoid this: stop drilling when the masking tape reaches the wood.
3. Per diagram: Use your 1/8" drill bit to pre-drill for the 2 screws closest to the corner, for each corner. Put the first 2 screws in each corner, then check that your frame is still square by measuring both diagonals - adjust the frame if needed. Then with your brackets still attached, pre-drill and screw into the remaining holes.
4. Lay the frame over the hardware mesh and mark out where to cut, then use your tin snips to cut it close to the wires of the mesh so there are a minimum of little pokey bits along the edge. It is unlikely the mesh will be square, but usually it is square enough to cut a rectangle that can be screwed securely to the frame without any overhanging edges.
"pet-proof" or bug screening can simply be cut with a utility/exacto knife.
5. Screw the mesh/screening in place along all 4 edges, keeping it as flat as possible.
- If you are using fancy hardware, or making sliding window screens that need to be partially disassembled to fit into place, you'll want to put the mesh/screen on the opposite face from the hardware
- If you are using the cheap corner braces, you'll want to put both the hardware and mesh to on the same (bad) face. Stop short of the corner braces: with all the frame pieces held in place by the mesh, unscrew and remove each corner brace in turn, then lay it over top of the mesh and screw it back in place using the same screw holes.
- If you are using "pet-proof"/bug screening: keeping taut, screw the 4 corners in place and then screw every approx 4 inches. Tack or staple along the rest of the edge.
